Stop Blurry Prints! Unlock Professional Quality with Canva Export Settings
Tired of blurry prints ruining your beautiful Canva designs? You're not alone! Many entrepreneurs, side-hustlers, and freelancers face this frustration, whether they're creating digital products for Etsy, social media graphics, or marketing materials. At Genius Junkie, we know your hard work deserves to look its best.
The secret to crisp, professional-quality designs lies in mastering Canva's export settings. It's not just about clicking "Download"—it's about choosing the right file type and settings for your specific project. Let's dive in and make blurry prints a thing of the past!
Mastering Canva Export Settings: Your Pro Guide
Achieving crystal-clear designs every time comes down to understanding the purpose of your final output. Is it for print or digital? This choice dictates your export settings.
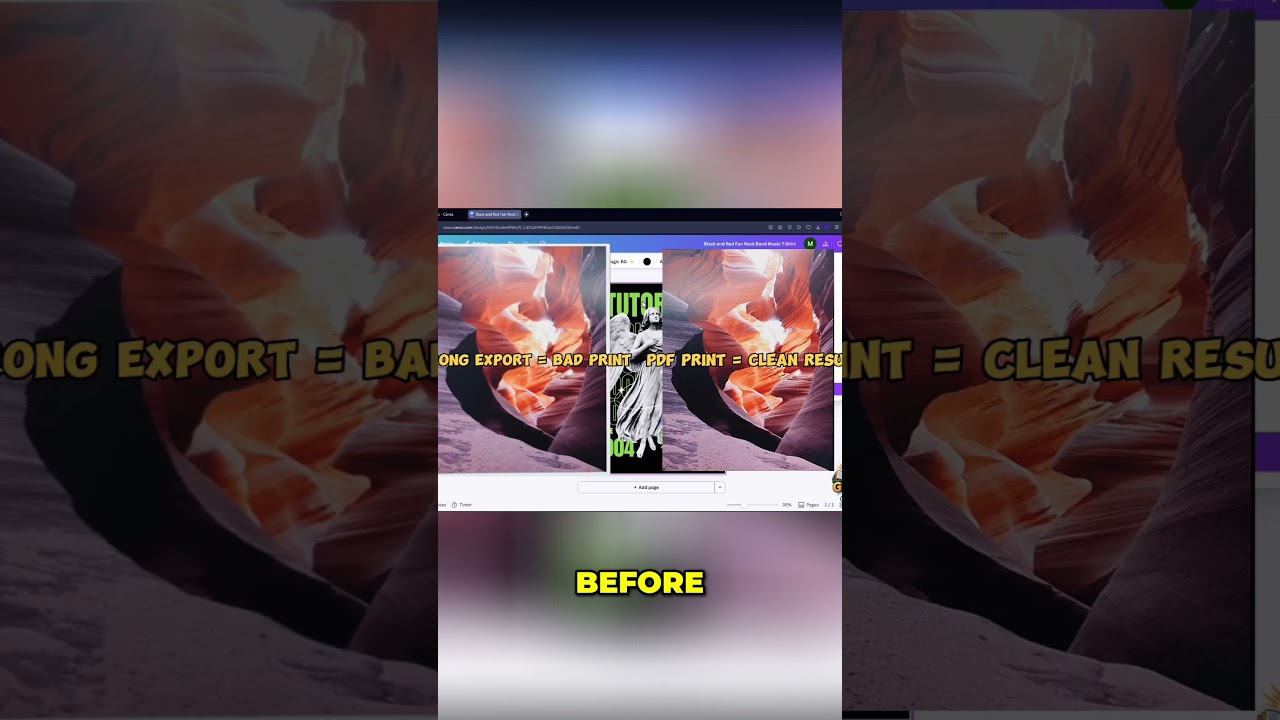
1. Select the Perfect File Type
Canva offers several export options, each with a distinct role:
- PDF Print (Your Go-To for Printing): For anything you plan to print—Etsy printables, flyers, business cards—this is your best choice. It ensures high resolution (300 DPI) and maintains crisp text and vibrant colors. For professional printing, select "CMYK"; for home printing, "RGB" is usually fine.
- PNG (Best for Web with Transparency): Ideal for logos, icons, or graphics that need a transparent background. PNGs are lossless, retaining quality for web use where clarity is key.
- JPG (Best for Photos & Web without Transparency): Use for photographs or web images where a smaller file size is beneficial and transparency isn't required. JPGs are "lossy," so choose a quality setting around 80-90% for a good balance of size and quality.
2. Optimize Size and Quality
After selecting your file type, look for additional options:
- Size (Canva Pro): For PNG and JPG, Canva Pro allows you to scale your design. If your original canvas was small, scaling up can help, but always aim to start with the correct canvas size.
- Quality (JPG): Adjust this slider carefully. Lowering quality reduces file size but can introduce blurriness.
Step-by-Step: Exporting Your Design Like a Professional
- Open your completed design in Canva.
- Click the "Share" button in the top right corner.
- Select "Download."
- Under "File type," choose the appropriate option (e.g., "PDF Print" for printables, "PNG" for web graphics).
- Adjust any specific settings for your chosen file type (e.g., "CMYK" for PDF Print, "Transparent background" for PNG, "Quality" for JPG).
- Click "Download."
Who Needs This Guide?
This guide is essential for entrepreneurs, side-hustlers, freelancers, and anyone leveraging smart systems to make money online. From selling digital planners to creating client-facing graphics, professional-quality exports are crucial for your brand's success.
Tools & Resources Mentioned:
- Canva – Your essential design platform.
- (Add your affiliate links here) – Support Genius Junkie by using our recommended tools!
Ready to elevate your designs even further?
- Free Templates: [Your link]
- Paid Templates / Systems: [Your link]
Key Takeaways: Stop Blurry Prints Forever!
- For printables, always use PDF Print (CMYK for professional printers).
- For web graphics with transparency or maximum clarity, choose PNG.
- For web photos without transparency and smaller file sizes, use JPG.
- Always start with a canvas size appropriate for your final output.
- Double-check your downloaded files for quality before using them.
With these expert Canva export settings, you'll eliminate blurry prints and achieve the crisp, professional results your designs deserve. Go forth and create with confidence!